A Tank Top Pattern (sort of)
I really just based this pattern on me. And not many people are shaped like me. Which is good, because who doesn't like to feel unique? So I'll just explain how I did it.
Worsted weight yarn - I've used TLC Amore and Plymouth Encore.
1. Make a chain, the length of which adequately covers your boobal area, top to bottom. (I hook)
2. Make a long rectangle by single crocheting into the back loops of the previous row (the crochet version of ribbing).
3. Test by wrapping the long rectangle around your chest. Once the ends meet with the proper amount of tightness, seam it, fasten off. Put the seam in the back.
4. While wearing the tube and the bra you'll probably be wearing with the tank, mark where the straps hit, front and back. Yes, it's tricky to mark the back, you'll figure some way to do it. Take tube off. Put shirt on. Unless you'd like to crochet in your underwear.
5. Start strap (mine was 7 stitches) directly on tube, centering it at the bra mark. Single crochet until it goes over your shoulder and reaches the back of the tube (obviously, you'll need to put it on again). Sew to back, again centering it at bra mark. Repeat this.
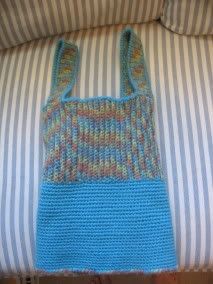
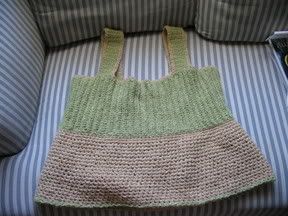
6. On the other edge of the tube, start single crocheting in the round. This is where I changed color because I had only bought one ball of the green and had no idea what the dye lot was since the wrapper had been lost for months. You don't have to change colors if ya don't wanna.
7. First round, I hook
Second round, K hook
Third round and on to bottom, M hook
8. Go around and around until it's long enough. What is long enough? You know your abdomen's feelings on public displays better than I do, go with your gut. Or cover your gut, whichever makes you most comfortable. Fasten off.
9. Since I had the two colors, I added a contrasting border on the top, straps and bottom.
Worsted weight yarn - I've used TLC Amore and Plymouth Encore.
1. Make a chain, the length of which adequately covers your boobal area, top to bottom. (I hook)
2. Make a long rectangle by single crocheting into the back loops of the previous row (the crochet version of ribbing).
3. Test by wrapping the long rectangle around your chest. Once the ends meet with the proper amount of tightness, seam it, fasten off. Put the seam in the back.
4. While wearing the tube and the bra you'll probably be wearing with the tank, mark where the straps hit, front and back. Yes, it's tricky to mark the back, you'll figure some way to do it. Take tube off. Put shirt on. Unless you'd like to crochet in your underwear.
5. Start strap (mine was 7 stitches) directly on tube, centering it at the bra mark. Single crochet until it goes over your shoulder and reaches the back of the tube (obviously, you'll need to put it on again). Sew to back, again centering it at bra mark. Repeat this.
6. On the other edge of the tube, start single crocheting in the round. This is where I changed color because I had only bought one ball of the green and had no idea what the dye lot was since the wrapper had been lost for months. You don't have to change colors if ya don't wanna.
7. First round, I hook
Second round, K hook
Third round and on to bottom, M hook
8. Go around and around until it's long enough. What is long enough? You know your abdomen's feelings on public displays better than I do, go with your gut. Or cover your gut, whichever makes you most comfortable. Fasten off.
9. Since I had the two colors, I added a contrasting border on the top, straps and bottom.
posted by Pam at 8:42 PM
3 comments
![]()